Annotations which stay solely in Bisque aren’t incredibly useful. One of the main reasons for marking up images is to be able to use those annotations for some other purpose, such as training classifiers, computing metrics and features. In this post, we show how to take the annotations from bisque via REST, and convert them into binary masks in matlab.
In general the concept is similar to other posts, but of course there are always some unique variables which must be taken into account.
We begin by looking at what our annotation looks like, here we can see a region created with a “polygon” type object. Additionally, we can see that its filename is 8974_01018.tif.

This process has 4 steps:
- Obtain URI for filename
- Use URI to obtain xml annotations
- Parse XML to x,y coordinates
- Convert x,y coordinates into binary mark
Step 1: Obtain URI for filename
- uri_url=sprintf('%s/ds/image?name=%s',BASE_URL,original_file_name);
- uri=urlread(uri_url,'Authentication','Basic','UserName',USER,'Password',PASSWD);
- expression='uri=\"(?<uri>\S+)\"';
- uri=regexp(uri,expression,'names');
- uri=uri(2).uri;
We query the image resource of the dataset service, specifying the filename that we’re interested in getting annotations for. This looks like this:
We use the urlread function of matlab to perform the REST GET, but we need to make sure that we also supply a username and password and specify that we’ll be using basic http authentication.
Once the function returns, we have an xml block containing all of the files which have the associated filename. Here we assume that there is only one file which has that filename, otherwise you can add on additional constraints or cycle through them to find the one of interest. Additional information on how to do that is here.
We then use a regular expression to grab the URI located second in the returned xml. We use the second one, because the first URI is associated with the resource query. Afterwards we have a URI that looks like this:
Step 2: Use URI to obtain xml annotations
- uri_url=sprintf('%s/gobject?view=full',uri);
- result=urlread(uri_url,'Authentication','Basic','UserName',USER,'Password',PASSWD);
Super simple. Now that we have the URI, we append gojects to the end of it and hit the REST GET again to get an xml string containing the annotations:
- <resource uri="/data_service/00-yLsxTzLVGhD9Jyi7hfbcgh/gobject?wpublic=None&format=None&tag_query=&limit=None&offset=0&tag_order=&view=full">
- <polygon created="2015-02-25T17:17:18" owner="http://hawking.ebme.CWRU.Edu:8080/data_service/00-zFzVh6LJFDGHbEvkDyNEiS" permission="private" ts="2015-02-25T17:17:18" uri="http://hawking.ebme.CWRU.Edu:8080/data_service/00-yLsxTzLVGhD9Jyi7hfbcgh/gobject/547">
- <vertex index="0" t="0.0" x="170.5" y="406.0" z="0.0"/>
- <vertex index="1" t="0.0" x="155.0" y="396.5" z="0.0"/>
- <vertex index="2" t="0.0" x="148.5" y="387.0" z="0.0"/>
- <vertex index="3" t="0.0" x="147.5" y="375.5" z="0.0"/>
- <vertex index="4" t="0.0" x="159.5" y="369.0" z="0.0"/>
- <vertex index="5" t="0.0" x="166.5" y="366.0" z="0.0"/>
- <vertex index="6" t="0.0" x="168.0" y="323.5" z="0.0"/>
- <vertex index="7" t="0.0" x="180.5" y="309.0" z="0.0"/>
- <vertex index="8" t="0.0" x="200.0" y="308.0" z="0.0"/>
- <vertex index="9" t="0.0" x="214.5" y="318.5" z="0.0"/>
- <vertex index="10" t="0.0" x="232.0" y="342.5" z="0.0"/>
- <vertex index="11" t="0.0" x="240.0" y="360.5" z="0.0"/>
- <vertex index="12" t="0.0" x="248.5" y="376.0" z="0.0"/>
- <vertex index="13" t="0.0" x="255.5" y="389.0" z="0.0"/>
- <vertex index="14" t="0.0" x="257.0" y="397.5" z="0.0"/>
- <vertex index="15" t="0.0" x="251.0" y="408.0" z="0.0"/>
- <vertex index="16" t="0.0" x="231.5" y="416.5" z="0.0"/>
- <vertex index="17" t="0.0" x="210.5" y="417.0" z="0.0"/>
- <vertex index="18" t="0.0" x="184.5" y="413.5" z="0.0"/>
- <vertex index="19" t="0.0" x="177.5" y="410.0" z="0.0"/>
- </polygon>
- </resource>
Step 3: Parse XML to x,y coordinates
Once we have the xml string, we want to be able to parse it into an xml class so we can intelligently extract the data we’re looking for. We would like to use matlab’s xmlread, but it only accepts filenames or InputStreams. So to begin, we take our XML string and convert it to a java input stream:
- result_as_java_string=javaObject('java.lang.String',result);
- result_as_Input_stream=javaObject('java.io.ByteArrayInputStream',result_as_java_string.getBytes());
Then, we can use that input stream as the input to the xml read function:
- xDoc = xmlread(result_as_Input_stream);
From there we proceed as “normal“, with the only small modification being that we use ‘poylgon’ as the element tag we’re interested instead of ‘region’. We also make vertex, x and y lowercase.
- Regions=xDoc.getElementsByTagName('polygon'); % get a list of all the region tags
- for regioni = 0:Regions.getLength-1
- Region=Regions.item(regioni); % for each region tag
- %get a list of all the vertexes (which are in order)
- verticies=Region.getElementsByTagName('vertex');
- xy{regioni+1}=zeros(verticies.getLength,2); %allocate space for them
- for vertexi = 0:verticies.getLength-1 %iterate through all verticies
- x=str2double(verticies.item(vertexi).getAttribute('x'));
- y=str2double(verticies.item(vertexi).getAttribute('y'));
- xy{regioni+1}(vertexi+1,:)=[x,y];
- end
- end
Step 4: Convert x,y coordinates into binary mark
Using very similar code, we create the binary mask. The main qualm about this is that we need to know the number of rows and columns in the original image in order to be able to make a mask the same size. If the files are all of a fixed size, there is no need to obtain the dimensions as they can be fixed, and we’re not using the original image in any other way.
- info=imfinfo(original_file_name);
- mask=zeros(info.Height,info.Width); %pre-allocate a mask
- for zz=1:length(xy) %for each region
- mask=mask+poly2mask(xy{zz}(:,1),xy{zz}(:,2),info.Height,info.Width); %make a mask and add it to the current mask
- %this addition makes it obvious when more than 1 layer overlap each
- %other, can be changed to simply an OR depending on application.
- end
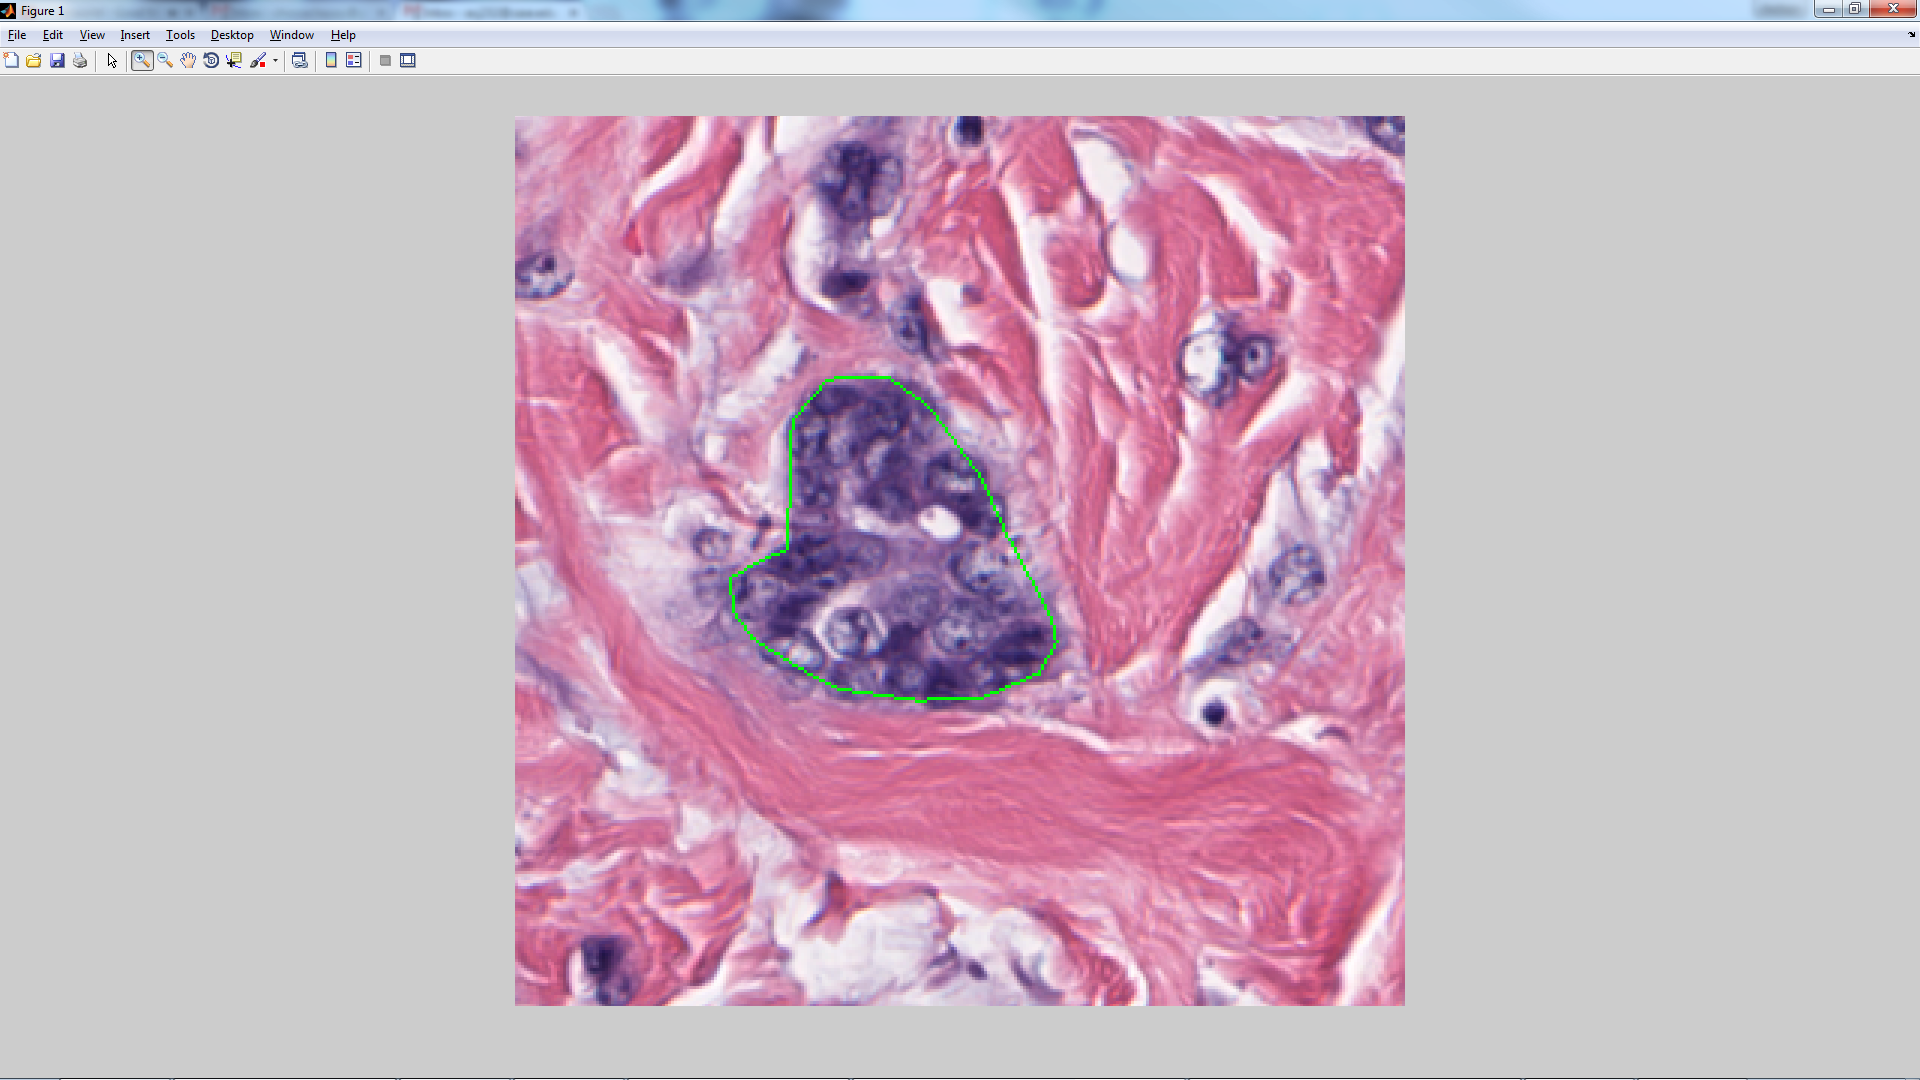
From there we can display the mask and see that it is exactly the same mask that we created before

Also we can use the binary mask overlay post to display the outline which is indeed matching with our original annotation.
Wait….Can’t I just query the nrow and ncol values?
Though, lets say you don’t have the original image handy. Bisque should be able to provide meta data associated with the image, right? Yessss…..
We can use the image service to give us some information about the image by using GET on this address:
we get back a nice chunk of information about the image:
- <resource uri="/image_service/00-yLsxTzLVGhD9Jyi7hfbcgh">
- <tag name="image_num_x" value="1000"/>
- <tag name="image_num_y" value="1000"/>
- <tag name="image_num_z" value="1"/>
- <tag name="converter" value="imgcnv"/>
- <tag name="format" value="TIFF"/>
- <tag name="image_num_p" value="1"/>
- <tag name="image_pixel_depth" value="8"/>
- <tag name="image_num_t" value="1"/>
- <tag name="filename" value="8974_01018.tif"/>
- <tag name="resource_uniq" value="00-yLsxTzLVGhD9Jyi7hfbcgh"/>
- <tag name="image_pixel_format" value="unsigned integer"/>
- <tag name="filesize" value="3028194"/>
- <tag name="image_series_index" value="0"/>
- <tag name="image_num_c" value="3"/>
- <tag name="image_num_series" value="0"/>
- </resource>
Inside we can see our image_num_x and image_num_y variables which contain our columns and rows, respectively. The question is then, how do we get this information out? Our normal xml parsing technique won’t work because the tag don’t have unique names, instead they have unique attributes. So, one way, is to iterate through all of the tags and stop when we get to a tag that we want. That is quite fine, but I was feeling a bit fancy and decided to step up my game. How do you ask? Using a compiled XPath 🙂
So to begin, we again get the xml using the urlread as before:
- uri_url=sprintf('%s?info',strrep(uri,'data_service','image_service'));
- result=urlread(uri_url,'Authentication','Basic','UserName',USER,'Password',PASSWD);
- result_as_java_string=javaObject('java.lang.String',result);
- result_as_Input_stream=javaObject('java.io.ByteArrayInputStream',result_as_java_string.getBytes());
- xDoc = xmlread(result_as_Input_stream);
From there we need to load the xpath classes and setup a new xpath instance:
- import javax.xml.xpath.*
- factory = XPathFactory.newInstance;
- xpath = factory.newXPath;
Once that is done, we simply compile two expressions, one for the x value and one for the y value, storing them into ncol and nrow, respectively:
- expression = xpath.compile('//tag[@name="image_num_y"]');
- nodeList = expression.evaluate(xDoc,XPathConstants.NODESET);
- nrow=str2double(nodeList.item(0).getAttribute('value'));
- expression = xpath.compile('//tag[@name="image_num_x"]');
- nodeList = expression.evaluate(xDoc,XPathConstants.NODESET);
- ncol=str2double(nodeList.item(0).getAttribute('value'));